Monday, March 31, 2014

Sweet Tequila Shrimp Tacos with Chipotle Lime Crema


My roommate, Courtney, and I got back early from Spring Break on Friday and were still left with the rest of the weekend to bum around and relax after a long 5 days of tanning and doing other recreational activities in Punta Cana. It was perfectly dreary and raining; exactly what I was hoping for believe it or not. The dismal weather gave us the perfect excuse to leave our luggage in the car for two days and not do anything whatsoever. My boyfriend came back in the early evening on Saturday, so after a long day of literally nothing, I thought it would be fun to cook something for us. (Because how often is nothing going on on a Saturday night, right?) I was stuck between the idea of making lasagna or shrimp tacos, but I already had shrimp from whole foods in the freezer, so that seemed like the more practical choice.

These tacos where so good we ended up buying more shrimp the next day so we could make more. I had made shrimp tacos over spring break last year for all of my friends that were staying with me at my dad's condo in Orange Beach, so I tried to remake what I did the first time. I really couldn't figure out exactly what I had done because I didn't write it down, but that just lead me to invent an even better recipe than before (this time taking full advantage of the top shelf tequila someone forgot in my apartment....)


Sweet Tequila Shrimp Tacos with Chipotle Lime Crema 

Shrimp Marinade

Ingredients 
Makes about 4 tacos

½ lb shrimp
1 ½ tablespoons honey
1 teaspoon chopped cilantro
about a teaspoon of lime juice
1 shot of tequila
¼ teaspoon chili powder
 1 clove minced garlic
½ teaspoon salt

few dashes of pepper

**I also made this with about 1 ½ lbs of shrimp and doubled the ingredients. If you are going to marinade it for a longer period of time, decrease the amount of tequila because the flavor can become overpowering.

Chipotle Lime Crema

Ingredients 
½ cup sour cream
½ cup greek yogurt
2 tablespoons of mayo 
2 teaspoons of chilis in adobo sauce (I scooped around the chilis)
½ teaspoon of sugar 
juice of half a lime 
salt and pepper to taste 
*Splash of milk or heavy cream (not necessary but makes it easier to pour) 

The first time I did this I used 2 tablespoons of the adobo sauce instead of teaspoons and it was SO spicy. I had to double the other ingredients and add sugar. 

Pico de Gallo

Ingredients 
(measurements aren't really important here - just work with what you have leftover)
Diced Roma tomatos 
chopped white onion
chopped cilantro 
lime juice 
fresh corn
Salt and Pepper to Taste


Saturday, March 29, 2014

Edamame Hummus Dip


Recently I've been doing a lot of daydreaming about what I want to do after culinary school. Maybe because people keep asking me, or because graduation day is approaching way too quickly, but I have so many ideas I don't know what to do with them all. I have an ongoing list of restaurant names on my iPhone that I wake up in the middle of the night sometimes to jot down (those aren't usually the best ones, but at the time they seem beyond brilliant) One of my dreams is to open a super girly spot (not aesthetically though of course, just conceptually) where people can go to actually get a light and healthy meal. Surprisingly these places are really hard to find. I would have less healthy/ heartier items to appeal to the hungrier folk, but a place like this really needs to exist everywhere. We kind of have one at Elon, and it does really well; always filled with girls too of course, but it doesn't have the ambiance I'm looking for.

It's a fact; girls love appetizers. We love dip, and small things that you can pop into your mouth. Just snacks in general really. I think its safe to say that girls snack/graze significantly more than boys, right? Anyway, I want to open a spot that has killer brunch and lunch (we would serve dinner too. can't expect to stay open without dinner) and an amazing terrace or outside seating paired with an extensive app, salad and wine list with small and light desserts. (because every girls WANTS dessert, but only wants a bite, right?)

Thus, I have made it a new goal of mine to try and invent and test out as many different dips as possible. It also helps that I bought a mini food processor over the summer when I was having a bad day and have been loving it ever since. I have made three kinds of hummus so far, and all of them have been really good, but I think this edamame hummus has been my favorite because it's so light.

Edamame Hummus Dip

Ingredients
1 1/2 cups low sodium chickpeas/garbanzo beans 
1 1/2 cups cooked edamame (I used the frozen kind)
1 1/2 cloves of garlic
3 tablespoons tahini
2 tablespoons lemon juice
6 tablespoons water
1 teaspoon salt 
1 1/2 tablespoon olive oil 

Start by mincing the garlic in the food processor and then add the tahini and blend until smooth (you will need to constantly scrape down the sides of the processor to make sure nothing gets left behind. You want it to be as smooth as possible). 

Then add the lemon juice, some of the water and salt and blend. Add the cooked edamame and blend until fine. 

Drain and rinse the garbanzo beans (I do it right in the can. No need to dirty a bowl or strainer)

Add the beans, rest of the water and olive olive and blend until you can't blend anymore. If you think you are done blending, you aren't. Keep going. and going. Unless you like it less smooth (which, for the edamame hummus, is actually kinda nice. I did it two ways, smooth and less smooth, and I couldn't decide which I liked best). - for a more hummus-y consistency though - blend until you think your machine is going to break from the bleeding. Then take a break and then turn it back on again. You want it to be as smooth as possible. 

Spoon into a dish and refrigerate at least 30 minutes. The dip is 1000x better when it's cold for some reason....

Drizzle good quality olive oil on top and serve with pita bread. I also LOVE this dip with sliced mini sweet peppers (you can find them in a pastil ziplock-like bag by the regular ones usually) I even tried it with carrots...and I was kinda into it. Which is saying something because I generally hate raw carrots. 


Tuesday, March 18, 2014

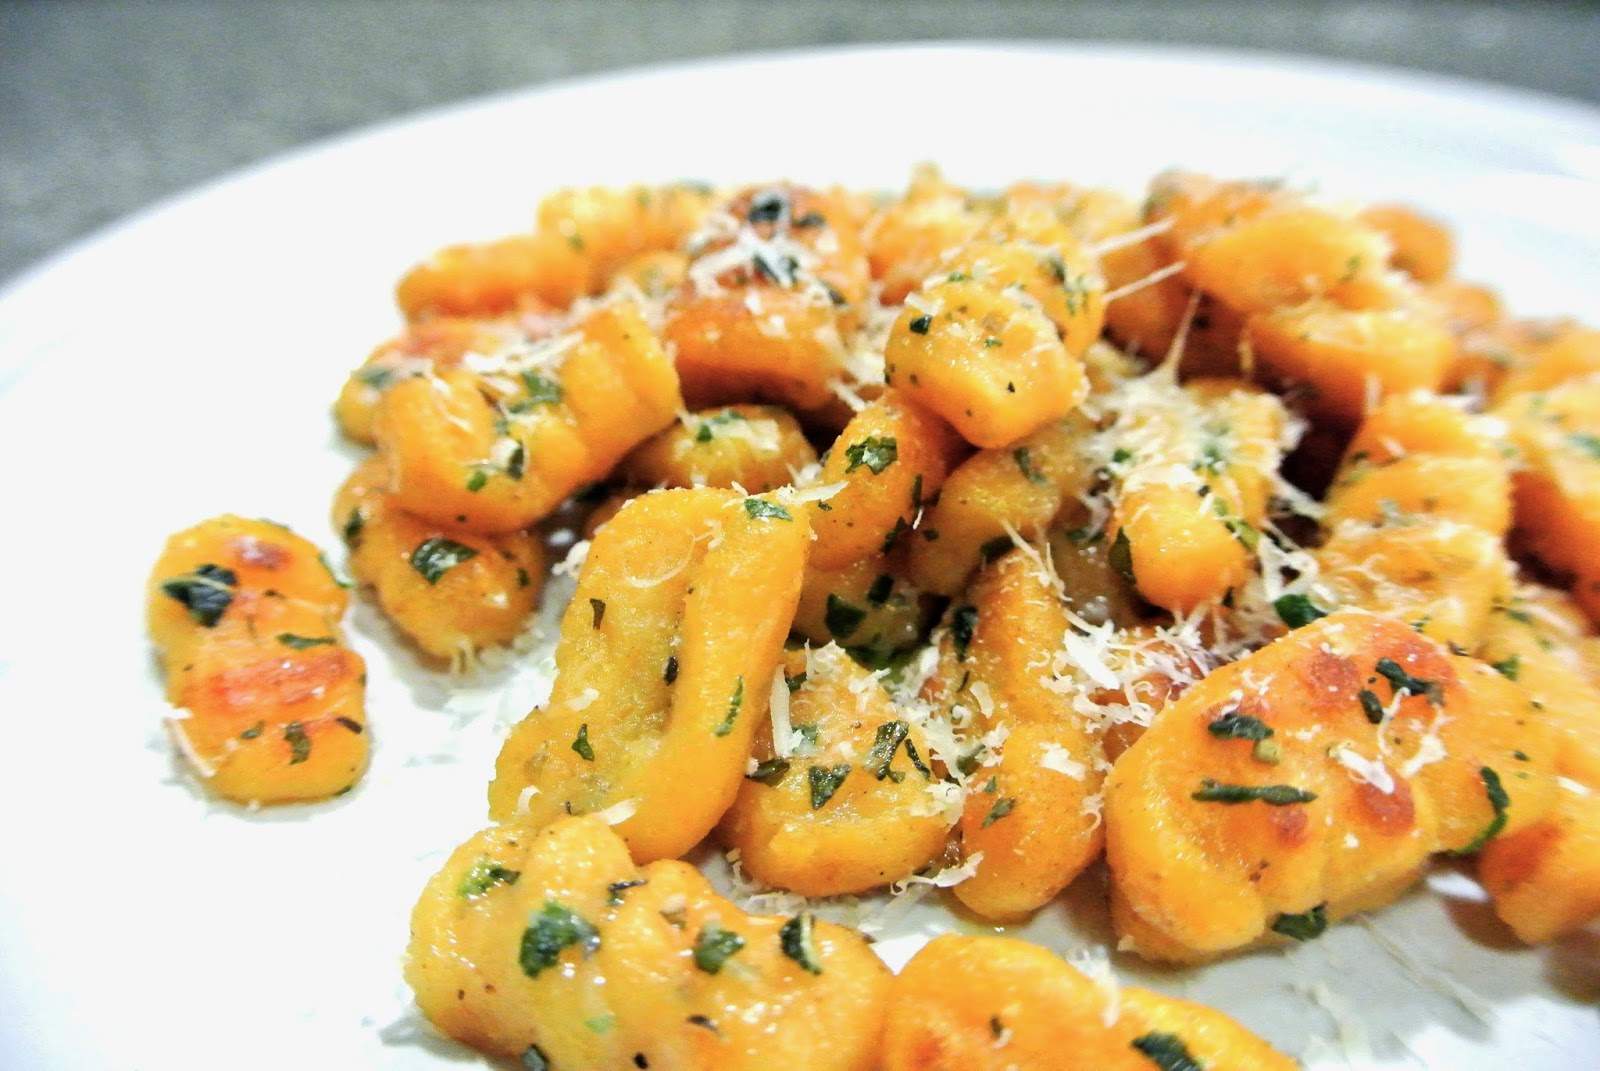
Sweet Potato Gnocchi with Browned Butter and Basil


So basically my sister, Melanie, and I are getting a bit obsessed with making gnocchi and I don't really know why. Yes, its delicious, but its insanely time consuming. Maybe its also because most of the ingredients are already available in your refrigerator or cabinet (other than maybe a potato/sweet potato or ricotta - but if you have milk and lemon juice you can make that too!) The first time I made it I didn't even have ricotta. I had cream cheese. So I made it with that. And it was so good! For my second attempt I wanted to keep things a bit more traditional to see if it made a big difference and I guess it did and it didn't. Both were honestly so good I would remake either! My next attempt will be with sour cream or something. I really like the idea of being able to use what you already have, and I feel like those can be interchangeable. I definitely need to practice more though to find out. 
Both times I made gnocchi though, I had a lot of extra time to spare and was really hungry too early in the day to start eating. I needed something to do with my hands before I started snacking up the waz. This is was the perfect solution. Most of the time when I'm cooking I lick my fingers, snack on the ingredients or frequently taste what i'm making, but that doesn't work with dough. (Unless you have snacks on the side...) So turn on Keeping Up with the Kardashians and get it work. It's worth it I promise, and so incredibly satisfying. You're ultimately making your own pasta. Who doesn't want to brag about that, right? 

Gnocchi Ingredients 
1 cup all purpose
1/2 cup cake flour
2 sweet potatoes 
1 cup ricotta cheese
1 1/2 tablespoons of honey 
1 egg
salt and pepper to taste
(additional flour may be needed during the shaping process)

-or-
1 cup flour
1 tablespoon honey
1 sweet potato
1/2 teaspoon salt 
dash of pepper 
egg
2 tablespoons cream cheese

**olive oil for boiling water

Browned Butter Glaze
3 tablespoons butter
dash of italian seasoning
1/2 teaspoon oregano
teaspoon chopped basil
truffle salt (if you have it - I'm obsessed with the stuff so naturally I try and put it on everything)
pepper to taste 
freshly grated parmesan 

Directions:
(I used microwave sweet potatoes because it is so much easier than baking and takes a fraction of the time)

In a medium sized bowl, mash up the cooked sweet potatoes. Then add the rest of the wet ingredients and mix well. Add the flour and stir gently until the dough forms a soft ball. 

On a floured work surface, break off small pieces of the dough and roll it into snakes like you used to do with play dough. (this may required additional flour because it sticks easily to the counter). With a knife, cut the dough snake into small bite sized pieces about a half an inch. (although this depends on the thickness of your dough snake - use your best judgement and just try and make all of the pieces roughly the same size)

Using your finger, roll each piece individually and the press it against the back of a fork or press the fork into the dough (either way works. I actually found pressing the fork into the dough was easier, even though I feel like thats not how they do it on TV etc.)

Gently toss the shaped gnocchi in flour and make sure not to stack them too high on top of one another because they tend to stick. 

Boil water in a medium sized pot. Add about 3 tablespoons of olive oil to prevent sticking. Gently place some of the gnocchi into the water with a slotted spoon. The gnocchi will float to the top when it is ready. Scoop them out with a slotted spoon and place them in a bowl or on a plate to the side. Continue to do this until all the gnocchi has been cooked. Don't try and do too much at once to prevent them from sticking to one another. You also wanted to guarantee that they all cook evenly. 

Heat the butter over medium high until golden brown (this happens quickly so be careful) Add the cooked gnocchi along with the other ingredients and let sit so it can get a nice crispy edge for several minutes. Add some freshly grated parmesan and serve immediately.